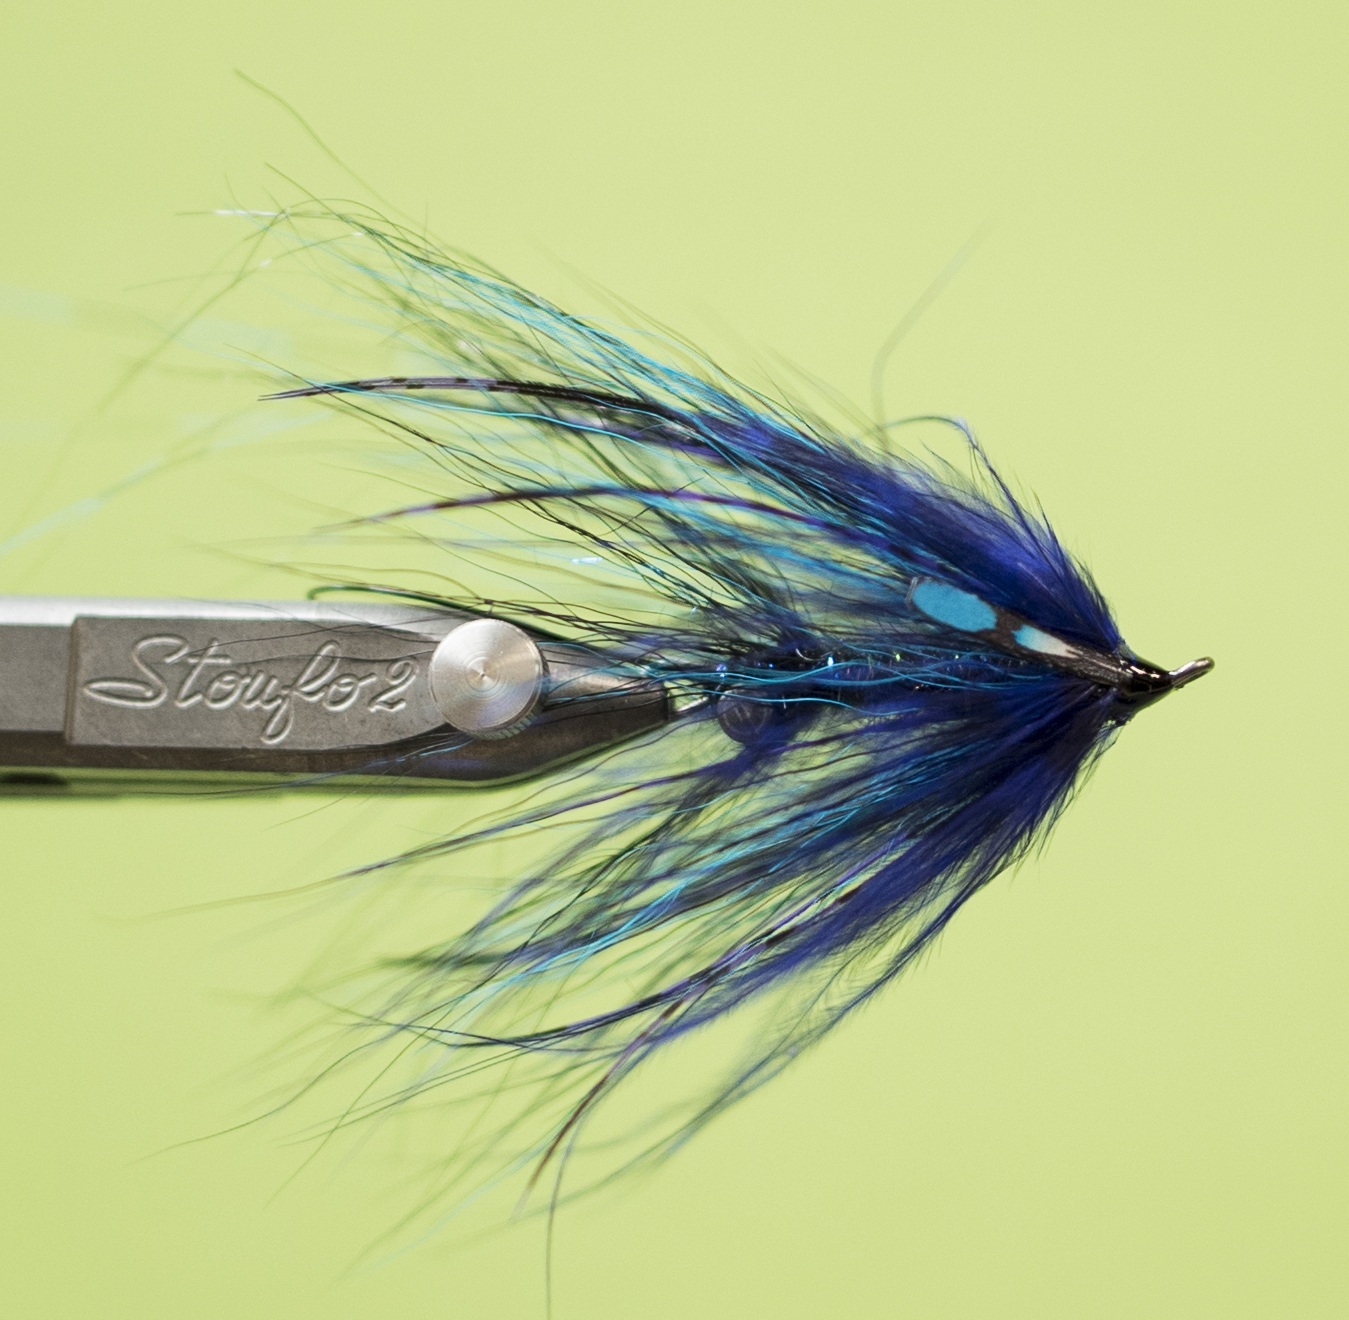
The Buck Nasty
Combine my Jerry French and Ed Ward influenced mind with Pat Kelly’s Bob Popovics obsession and you start to see what happens when fly tyers brainstorm. As usual every September my favorite worlds begin to overlap. My love for Smallmouth bass fishing and my just as strong love to swing a fly for Steelhead collide forming some interesting flies. Bob Popovics Hollow Fleyes are are a staple for us in the shop. This specific time I was focusing on smaller clear water streamers. After also studying up on the history of the Intruder fly I found myself with a pile of the materials for both patterns at my tying station. While complaining about my lack of organization Pat brought up the idea of a Hollow Fleye Intruder cross. I wanted a fly that would swim very well and produce a lot of vibration. We also needed the fly to be sparse and keep to the original Intruder Platform. That night after kicking the idea around in the shop I tied up the first prototype. I hesitate to even use the terms Intruder or Hollow Fleye as to not take away from the actual originals, but both of these patterns and originators are due the credit for the insperation. From its original formation the Buck Nasty there have been multiple editions, but this is the final product…at least for now!
Ryan Ratliff- December 2017
The Buck Nasty-Recipe
Shank: Senyo’s Articulated Shank 40mm by Flymen Fishing Co- Click Here
Hook: Daiichi 2553 #2-#4- Click Here
Thread: UTC 140 Black- Click Here
Weighted Eyes: Small Plain Lead Dumbell- Click Here
Stinger Loop: Senyo’s Standard Intruder Wire Black- Click Here
Dubbing Ball/Prop: Senyo’s Fusion Dub Midnight- Click Here
Rear Station: Large Northern Bucktail Black- Click Here
Rear Flash: EP Sparkle Black Purple- Click Here
Body: Senyo’s Fusion Dub Midnight- Click Here
Front Station 1: Large Northern Bucktail Fl. Blue- Click Here
Front Station 2: Large Northern Bucktail Black- Click Here
Front Flash: EP Sparkle Black Purple- Click Here
Wing 1: Lady Amherst Center Tail Lavender- Click Here
Wing 2: Barred Flashabou Fl. Blue- Click Here
Wing 3: Barred Marabou Blood Quill Purple Black- Click Here
Eye: Pro Sport Fisher Pro Jungle Cock Medium Blue- Click Here
Epoxy: Loon UV Clear Finish- Thin- Click Here
Cement: Zap-a-Gap- Click Here

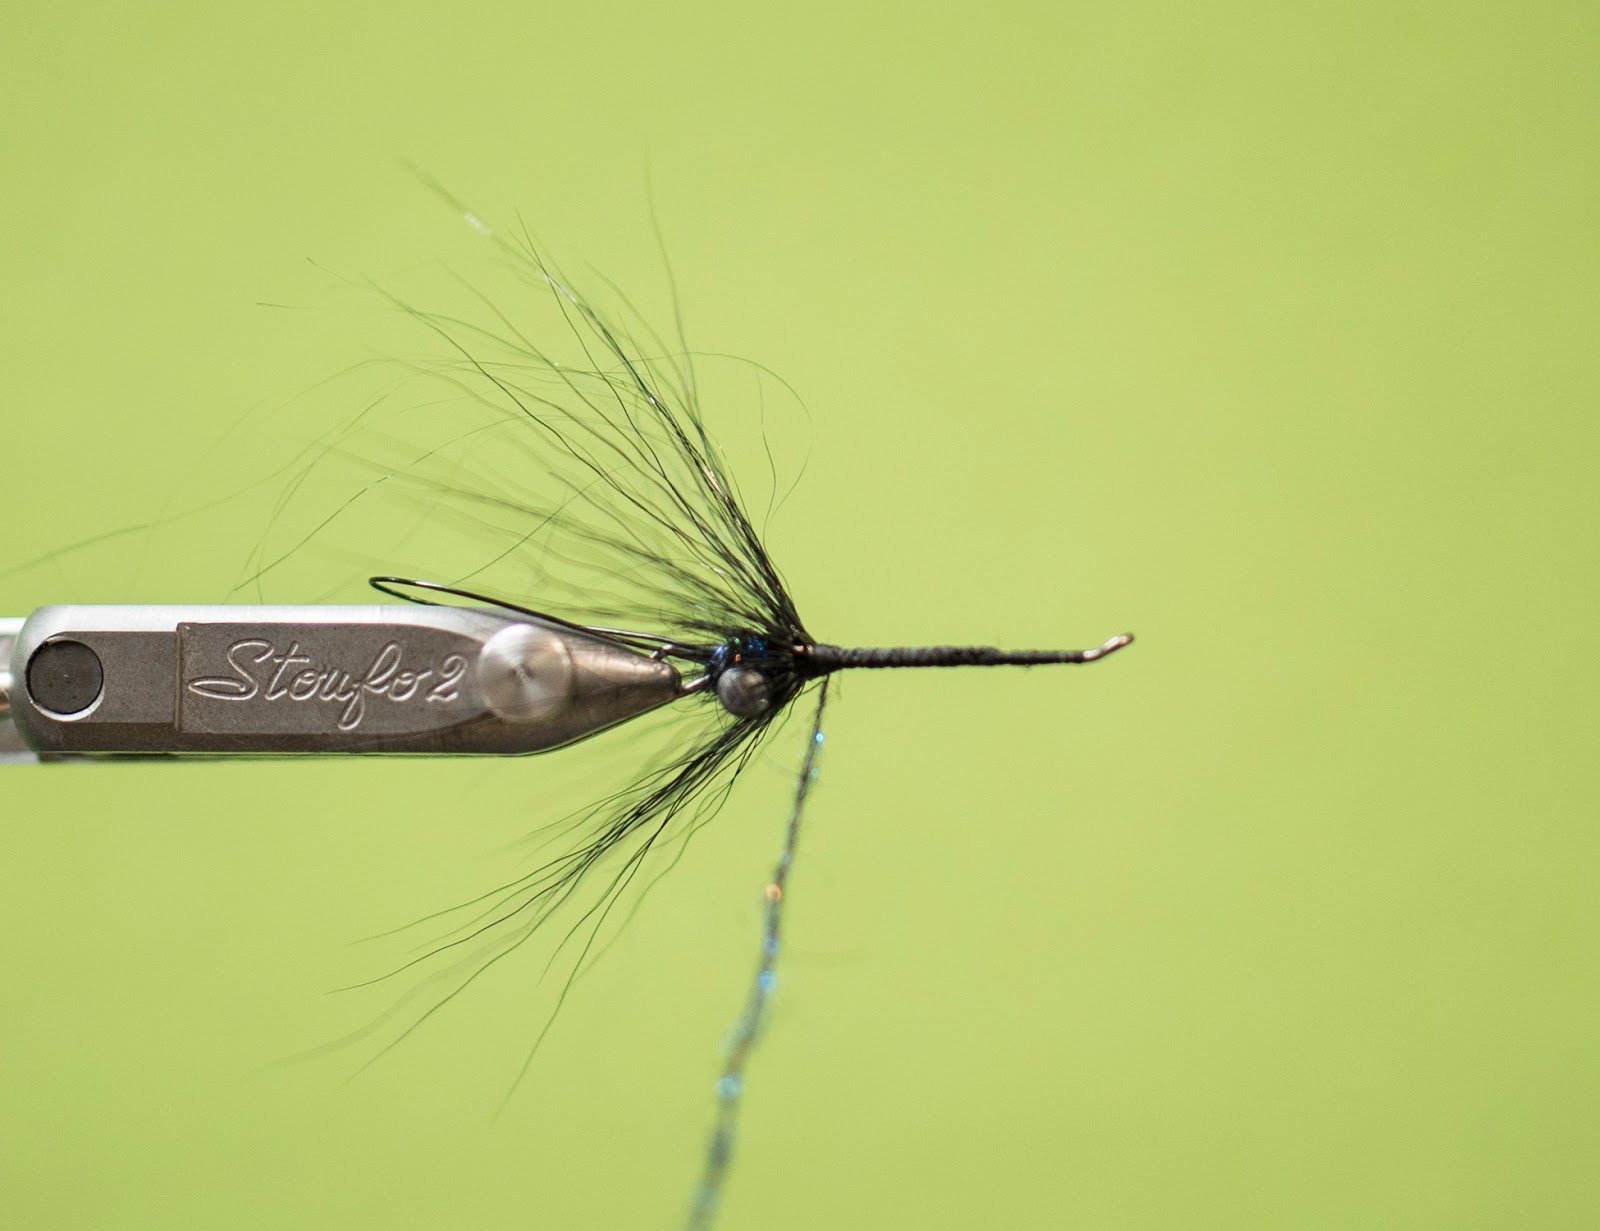
1. Place the Senyo Articulated Shank in the vise and cover with thread. Make sure to take care at the points where the shank loop back as this cut off point will cut your thread.

2. Tie in the Lead Eyes using figure 8 wraps utilizing the maximum pressure your thread can handle. Once the eyes are firm wrap your thread around the area that meets the hook like your posting a dry fly post.

3. Tie in the Senyo Articulation wire approx 6” length folded in half to make a loop. Wrap your thread like you are making candy cane stripes up and back 3 times. Make sure to use the maximum pressure of your thread causing crisscrossing wraps.


4. Next dub a ball of the Fusion Dub around the lead eyes.


5. Cut a small clump of black bucktail from the hide. This amount should be very sparse. Once you have it sized to the length of the Stinger loop tie the clump with the tips facing the eye of the shank. The tie in point should be just in front of the eyes and dubbing ball. Start with two loose wraps then allow the bucktail to evenly encircle the shank. Once encircled lock the hair down with a couple more wraps. Take a hollowed out pen and slide it over the shank and push the bucktail back. Grab it and remove the pen. Pull your thread in front of the bucktail and start to build a thread dam. Do not wrap on top of the bucktail, just build up in front. Once the bucktail is angled back at roughly 45 degrees apply some UV Epoxy to the thread wraps.

6. Next pull out a few strands of EP Sparkle. Tie them in at the middle of the strands, but on the cone of thread built up as a thread dam. Fold the strands of EP sparkle back over itself and wrap two turns of thread to lock it in. Trim the EP Sparkle to just past the stinger loop.

8. At this point pull out some more dubbing and create a ball just before the doubled over eye loop.
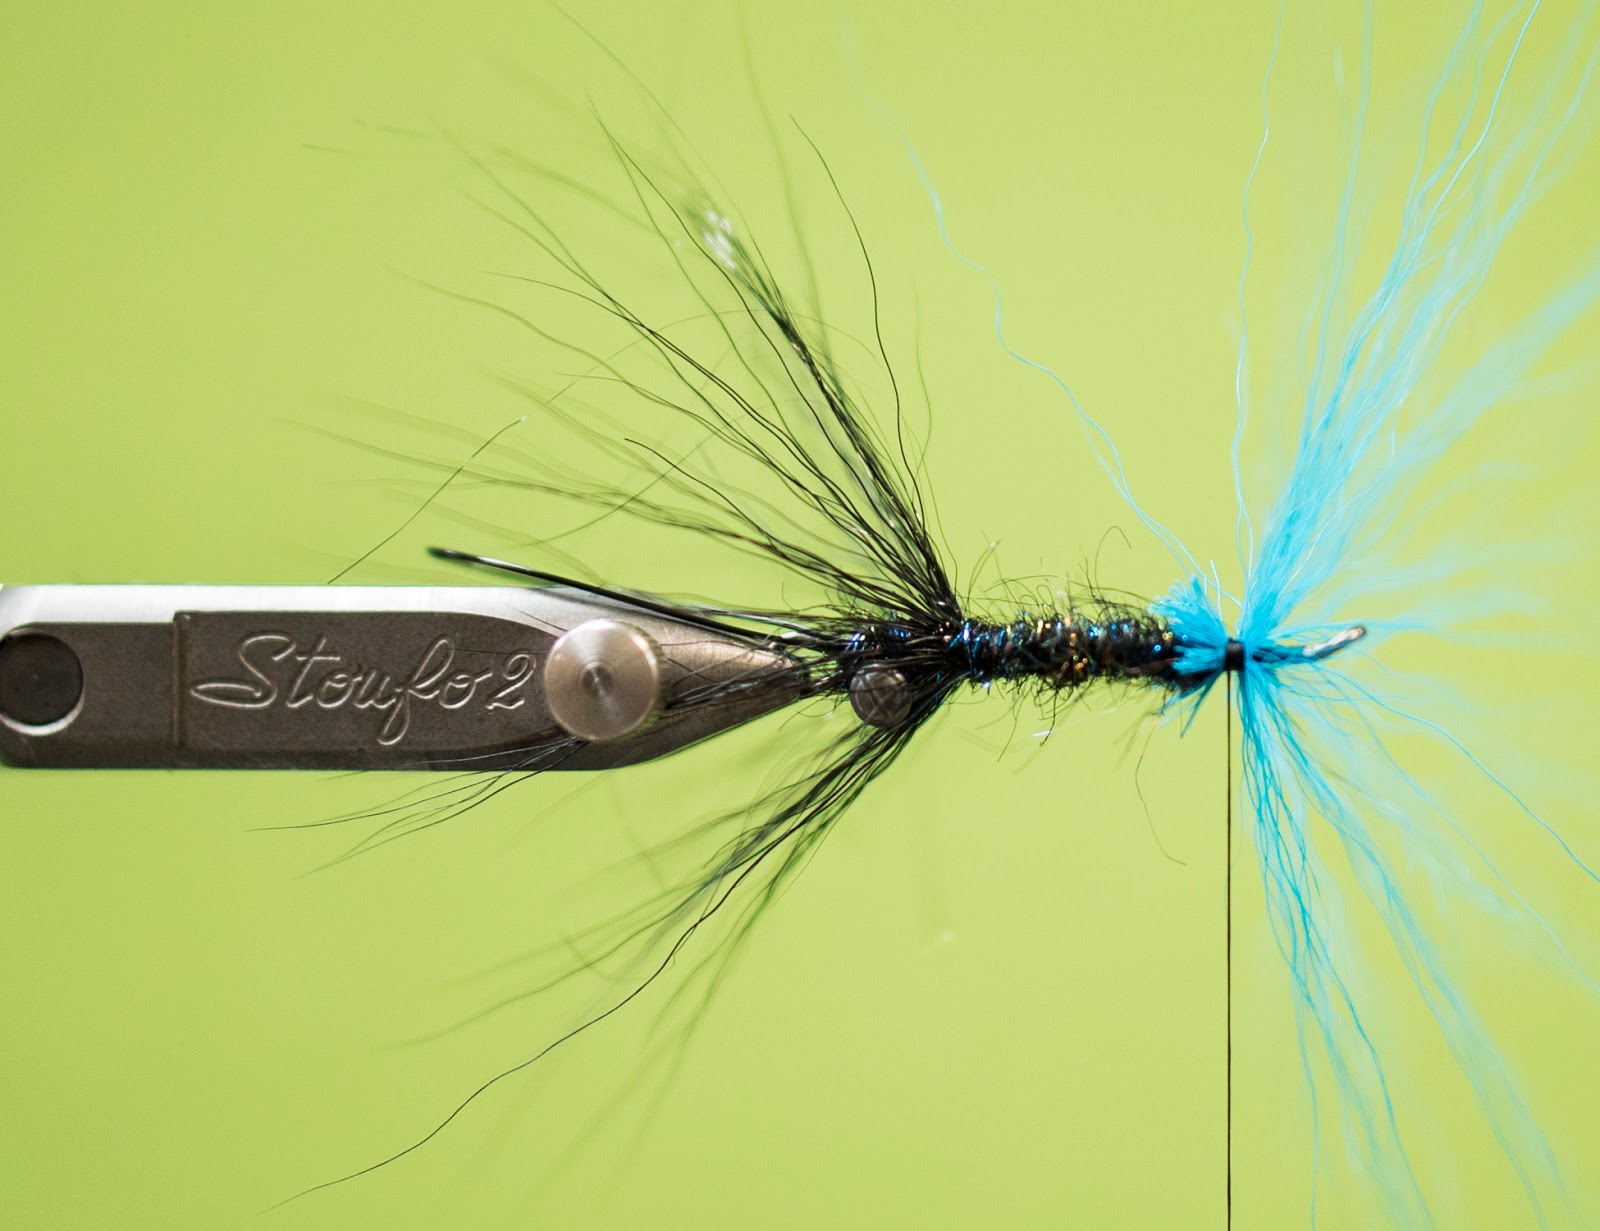


10. Pull out a few strands of EP Sparkle and repeat step 6.

11. Cut off about 12-15 barbs off the middle of a Lady Amherst tail feather. Pair up the barbs and begin tying them in evenly around the entire shank. Make sure to use only two wraps per set. Once you get them all around the shank take your left hand and hold them all in place. Next unwrap all of the thread that is holding the Lady Amherst down. Once they are untied, but still held in place with your left hand make two loose wraps and tighten down. Double check that nothing has shifted and follow up with two or three more tight wraps. This might seem a little redundant, but is nessesary to keep thread bulk at a minimum.


13. Select a single Montana Fly Grizzly Marabou plume in Pulrple Black bar. Hold the feather by the tip with the concave side facing away from you. Strip all of the fibers off the left side. This will make for a sparse, but flowing wing. Tying in by the tip palmer the plumb around the shank keeping each wrap close together. Tie off the stem and trim.

14. Prep two Pro Sport Fisher Pro Jungle Cock Eyes in Medium. Tie them in on each side of the fly. I like them to be slightly angled up pointing back. Trim off the tags by the eye of the shank.

15. Whip fininsh and coat the Jungle Cock and the stem of the Marabou plumb with Loons Thin UV Finish. Hit all the sides with your Infinity Lite.
16. Attach the hook by compressing the stinger loops tightly. Pass the wire through the hook eye and over the entire hook. Hook point up or down is a preference choice. Typically I fish this fly with the hook point down to prevent hooking a fish far back in the roof of the mouth.
Grab your favorite two-hander, skagit head, and sink tip. Now your ready to find some grabby fish!
Watch the Video!
Click Here to subscribe to our YouTube Channel

Mad River Outfitters/The Midwest Fly Fishing Schools
Fly Shop, Classes, Schools, Guides, Hosted Travel and more!
813 Bethel Rd.
Columbus, Ohio 43214
614-451-0363
admin@madriveroutfitters.com