
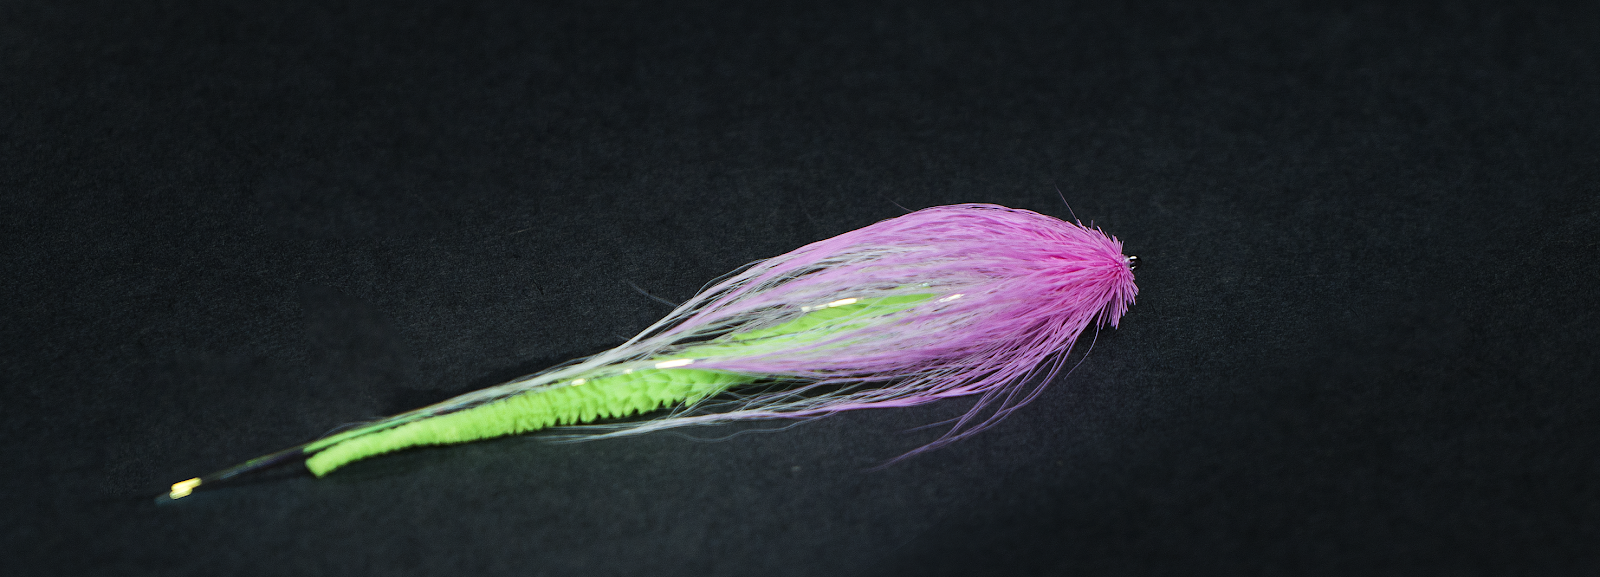
Bulkhead Deceiver Fly
This variation of the BULKhead Deceiver was tied as a Smallmouth Bass fly but can obviously be tied in any color that you see fit for the application at hand. An upsized version of this fly also works extremely well on Musky, Pike, Peacock Bass and any other predatory game fish. Absolutely killer of course for the salt!
After you get a chance to fish the BULKhead and see how it behaves or misbehaves in the water you will have a hard time fishing anything else.
The great thing about this fly is it is really just a technique for building the head of a fly so you can take these principles and apply them to other patterns with great success!
“BULKhead” Deceiver- Recipe
Thread: 100 Denier GSP- Click Here
Hook: Partridge Universal Predator 2/0- Click Here
Tail: Mangum Dragon Tail- chartreuse- Click Here
Hollow tie #1: White Bucktail- Click Here
Hollow tie #2: White Bucktail
Hollow tie #3: White Bucktail
Flash: Mirage Flashabou- opal or Lateral Scale- Click Here Click Here
BULKhead tie’s 1-3: Light Pink Bucktail

1. Start your thread 1/3 back from the eye of the hook and wrap a foundation of thread to the rear pf the hook. Starting your thread a third back from the eye gives you a reference point as to when you need to make the transition from the body of the fly to the head of the fly. By marking this point with your thread it ensures you do not leave yourself short on space when finishing the fly.

2. Take the Mangum's Dragon Tail and cut it approximately the length of three and a half shank lengths and tie in just above the barb of the hook.


3. Hollow tie-in your first clump of white bucktail just above the barb of the hook. You will want the finished angle of your bucktail to lay more or less flat against the Dragon Tail. As with all hollow flies we will gradually increase the angle of our hollow ties as we progress forward.


4. Secure flashabou/lateral scale to the hook shank allowing for sixty percent of the total length to extend towards the tail of the fly and the remaining forty percent extending out toward the eye of the hook. Once complete fold the flash that is extending out toward the front of the fly back over itself and secure. By staggering the length of your flash you are creating taper, giving a much more natural look and increasing the overall movement of the flash. This will be a reoccurring theme in most all of my fly tying tutorials. One should always be considering shape and taper when constructing a fly. Your finished product will not only look more natural but will also swim better as a result.


5. Tie in two more hollow ties of white bucktail. With each tie you need to increase both the amount of hair and angle of hair as you progress forward. Again always thinking about shape and taper in the finished product.


6. At this stage of the fly we need to start introducing bulk as this is what makes this fly swim so well.
Cut a fairly good bundle of hair from the base of the bucktail. Generally speaking the hair located at the base is going to be larger in diameter and most importantly hollow, an important characteristic to executing this stage of the fly effectively. Because the hair is hollow thread tension will compress and flair the hairs much like when spinning or stacking body hair. Hold bundle of bucktail on top of the hook shank, with tips facing reward and butt’s facing forward. Trap with three loose thread wraps. Now before tightening thread wraps you will want to distribute the hair evenly 360 degrees around the hook shank. Once evenly distributed tighten thread and lock into place. Shorten some of the innermost fibers with a handful of scissor snips in the center of the forward-facing butt fibers. The goal is to create taper and have a well-proportioned cone when the butt fibers are forced back toward the rear of the fly. Like with any hollow tie when folding the butt fibers back, build a thread dam with your tying thread to hold in place.
7. Repeat step 6 two more times. Each time gradually increasing the amount of hair used and decreasing the overall length of hair in each tie (creating shape and taper).


8. We may want to reference the youtube video at this stage here. Dip the fly in water and then tightly hold down the tapered ends of the front three collars, exposing the butts. Trim these fibers to angle gently down to the eye of the hook, creating an even, rounded, or conical head. When the fibers dry, snip out any stray butt fibers to finish tapering the head. The process is similar to trimming a spun-hair bug, but since the hair at the head of the fly includes both tapered and butt ends, take care to trim mostly the butts, leaving the tapered ends to complete the smooth shape and profile of the fly.
So there you have it! Again, more of a technique and style of fly here than a specific pattern. You of course may want to add eyes to this, although I usually don't on my "guide flies". You can certainly play with the size, colors and tailing materials. I just figured I'd include the Mangum's Dragon Tail in this one since they are such a hot topic right now. We are incorporating them into many of our fresh and saltwater patterns with great success. Yet another "game changing" material in our opinions around here.
One thing I do know........this style of fly will become one of your favorites!!!
Pat Kelly- March 2018
Watch the Video!
Mad River Outfitters/Midwest Fly Fishing Schools
Fly Shop, Fly Fishing Guides, Hosted Fly Fishing Travel, Schools, Classes and more!
813 Bethel Rd.
Columbus, Ohio 43214
614-451-0363