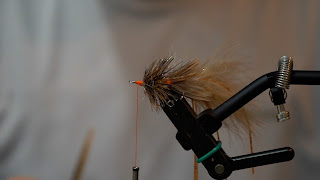
"Leggy Boi"
Big shout out and thank you to Mike Schultz and the crew at Schultz Outfitters for developing this pattern and continually pushing the boundaries of warmwater fishing and the patterns we use.
The Leggy Boi can be tied in a limitless amount of color variations and color combos. Try not to get caught in the generic white colorway. Often times the more adventurous you get with different color combos, the more fun the outcome. With nearly endless colors available in feathers, brushes, props, and rubber legs, you are only limited by your imagination.
Mike has a great
video tutorial on his YouTube channel for this fly (as well as countless others that I highly recommend watching). It is full of great tips and tricks as it pertains to both how he ties and fishes this incredible fly.
Below is our step-by-step on how to tie the Leggy Boi. The full list of materials can be found below.
1. Select one or two marabou plumes and tie off the back. Try to keep the length generous as you want this fly to move and swim as much as possible.
2. Take one full strand of legs and fold around thread creating a pair and tie in on either side of hook. Repeat on other side of hook.
3. Select two hen saddles near the top of the saddle where you will find the smaller feathers. Tie the feathers in and wrap up the remainder of the shank as you would on a Feather Changer (
see Feather Changer tutorial video here) and tie off.
4. Insert second 15mm shank into your vise and tie in the prop material. Here we happen to be using the 1" Translucy Brush trimmed down slightly. Wrap the brush forward until you are a little past half way on the shank and tie off.
5. At this stage we will select two full length strands of rubber legs. Fold in half as we did previously and tie down. Repeat this step on the far side of the fly as well.
6. Finish the remaining shank by selecting two more hen saddles and wrap forward to the eye. This time you want to make sure you grab feathers that are a little bigger than the previous pair as to begin building shape and taper to the fly.
7. Insert hook and attach the two shanks, either with a shank or by using articulation wire.
8. Repeat the same steps as we did on the previous section. Tie in 1" Translucy Brush, wrap forward a little beyond half way and tie off. Trim down a little so that the prop is not at full length but bigger than the previous shank. After this tie in two legs folded in half on both the near and far side of the hook.
9. Once the legs are tied in, you will select two more hen saddles, slightly larger than before. Tie in and wrap forward covering the remainder of the shank.
10. After the first hook is completed you will insert the 25mm shank into the vise and repeat the steps exactly as we did in previous sections. Only difference here is you will be building two stations on this shank instead of one. The prop on the first station will be the 1" Translucy Brush but left at full length. The second station you will switch to the 2" Translucy Brush but trimmed down to be a little longer than the previous station.
11. Insert the Ahrex SA280 hook and before attaching the previous section, slide the Slotted Tungsten Bead up onto the hook then proceed to attach the previous section.
12. As we did on previous shanks, attach the 2" Translucy Brush and wrap 3/4 of the way up to the bead and tie off. Select three large hen saddles. If you do not have anything wide or big enough for the task, feel free to use bigger schlappen feathers as a substitute here. After this step you can go right to the EP Crustaceous Brush or add an accent color first, totally up to you.
13. Tie in the EP Crustaceous Brush and wrap forward all the way up to the eye of the hook. The amount of wraps and density is completely up to you and what you want out of the fly. Comb fibers out as much as possible. Begin to trim down and shape the head to your likening.
Have any questions on tying this fly? Give us a call at 614-451-0363!


.jpg)


