
The Plantation Crab
This fly came about a few years back while hanging out at my favorite haunt, the Woodland Plantation down in Southern Louisiana. We had been tossing a few different crab patterns for a few years and really hadn't found anything that consistently fooled the fish. I hesitate to say that I invented this fly for sure....it's certainly copied off of something I had seen previously. It's basically a variation on a Tarpon Toad. Regardless, over the past few years this fly has become a staple on our trips as well as a "Guides Favorite". Seems like I'm constantly tying them to send down there for many of the guides that we work with. The fly is also gaining some popularity for Permit as well and a couple of customers have had good results in Belize and Cuba with the pattern.
Posted here is the recipe and the step-by-step photos to go along with our YouTube tutorial. This is the format we will be using going forward with these tutorials that we'll be posting to the channel. As always, we appreciate you tuning in and be sure to let us know if you have any questions or comments.
Best,
Brian Flechsig- December 2017

A big bull Redfish taken on the Plantation Crab last year on the MRO Woodland Plantation Trip
The Plantation Crab- Recipe
Hook: Gamakatsu SL11-3H size 1/0- Click Here
Thread: Danville Flat Waxed Nylon- Fluorescent Green- Click Here
Eyes: Medium- 7/32 Lead Dumbell Eyes- Chartreuse- Click Here
-or- Large Gold Bead Chain Eyes- Click Here
-or- Large Gold Bead Chain Eyes- Click Here
Tail #1: Pro Sportfisher Finn Raccoon- Light Gray- Click Here
Tail #2: Barred and Speckled Crazy Legs- Orange- Click Here
Tail #3: Pearl Flashabou- Click Here
Tail #4: Light Olive Marabou- Click Here
Tail #5: Enrico Puglisi Tarantula Brush- Tan- Click Here
Body: Enrico Puglisi EP 3D Fibers- Eel Green and Sand- Click Here
Cement: Zap-a-Gap- Click Here

1. Score the hook! This is a technique that Dave Whitlock taught us many years ago. It pretty much eliminates the thread and materials from spinning around the hook. One of the problems with the early versions of this fly was that they didn't last long and would spin and rotate after a fish or two. Adding this step has made these flies virtually indestructible.

2. Start the thread behind the eye and wrap back to the bend. I then coat the thread with Zap-a-Gap and wind back to behind the eye. It is not critical to get the underwraps perfectly spaced here and I think that some "criss-crossing" even adds to the durability.

3. Tie-in the Chartreuse Medium Lead Eye just behind the eye of the hook using the "figure 8" method. I then add some Zap-a-Gap and repeat the process with the thread.

4. Wrap the thread back to the bend of the hook. Then tie-in the Finn Raccoon as the "under tail". The tie-in point should be right at the bend and you should secure all the tail materials right up to the point. I make this measurement prior to tying in so that I can make the perfect cut on the material before I tie it in. This way you don't have to trim anything after you have secured to the hook.

5. Next comes the Crazy Legs. I cut three legs out of the bunch and use the entire length. Make sure that your thread is at the POINT of the hook and I then fold the legs under the hook shank and bring them above the hook as shown. Make sure you have three legs on each side. Then I take the thread and start to wrap towards the bend. The first few wraps you will continue to hold the legs up, and then as you continue to wrap back to the bend, you will begin to bring them down along the sides of the hook shank. At this point you will seperate the legs, making sure that you have 3 on each side, and use the thread wraps to get the proper placement. Wind up with the thread at the bend of the hook.

6. Now you are going to add the Pearl Flashabou. I usually grab about 6 strands and cut from the top of the hank. This gives you plenty of length. Starting at the bend, I lay the strands along the hook shank and get the proper length on the side closest to me. I usually want this a bit longer than the Raccoon tail. I then begin to wrap towards the hook point to secure the flash in place. Once I get to the point of the hook, I fold the remaining flash over and hold in place along the shank while I then wrap back to the bend. This allows you to get the flash on both sides without having to tie in two separate bunches. You can then trim the bunch on the far side to match the length on the near side.

7. Now you will add the Light Olive marabou to the top of the tail. Again, make your "measurement cut" so that you tie this in from the bend to the point and don't have to trim any excess once secured. I like for the marabou to be slightly shorter than the Finn Raccoon on the underside. Wrap the thread back to the bend.

8. Tie in the Enrico Tarantula Brush. Again using the area from the bend to the point to secure. I then wrap the Tarantula Brush forward and usually get about 5 or 6 wraps jammed into that "space" between the bend and the point. In between each wrap it is very important to stroke the brush fibers back and out of the way of the next wrap. Otherwise, the fibers and rubber legs get trapped down and it becomes a mess.

The finished "Tail Section". I typically come in with a Bodkin or my Scissor Points and pluck out and fluff the Tarantula brush making sure that all the fibers and rubber legs are able to do their job. Your thread should be hanging right in front of the tail section, which should be right about even with the hook point.

9. Now we are going to grab our 3D EP Fibers. Eel Green and Sand are the colors that I use. A little trick I learned and show in the video is when you open the package, pull all the fibers out as a unit and use a stout rubber band on one end to secure them. This keeps them from getting tangled and makes it much easier to cut the amount that you want.

10. Cut off a hunk of the EP Fiber say about the diameter of a pencil or so. I then cut off pieces about 2" or so as I am tying them in. Lay the 2" piece perpendicular to the hook shank and on top. Then take your thread and cross over the Fiber twice forward, and twice backwards, creating an "X" of thread. I will then take two or three wraps right in front while stroking the fibers back. I will then repeat this process moving up the hook shank until I jam the last bunch right behind the eye. I start with the Eel Green and usually get 5 bunches tied in. Eel Green, Sand, Eel Green, Sand and Eel Green right behind the eye.

11. You can now secure the thread and I do this in front of the lead eye. You can of course use whatever method you prefer but I typically just throw a few half hitches in there. As well, the Zap-a-Gap is typically still a little wet so it will grab onto the thread as well and add some extra security.

12. Now I take my Zap-a-Gap and run it right along the hook shank on top of the EP Fibers. This glues the material and the thread wraps to the under thread and helps to keep the entire fly in place and keep the fibers from pulling out.
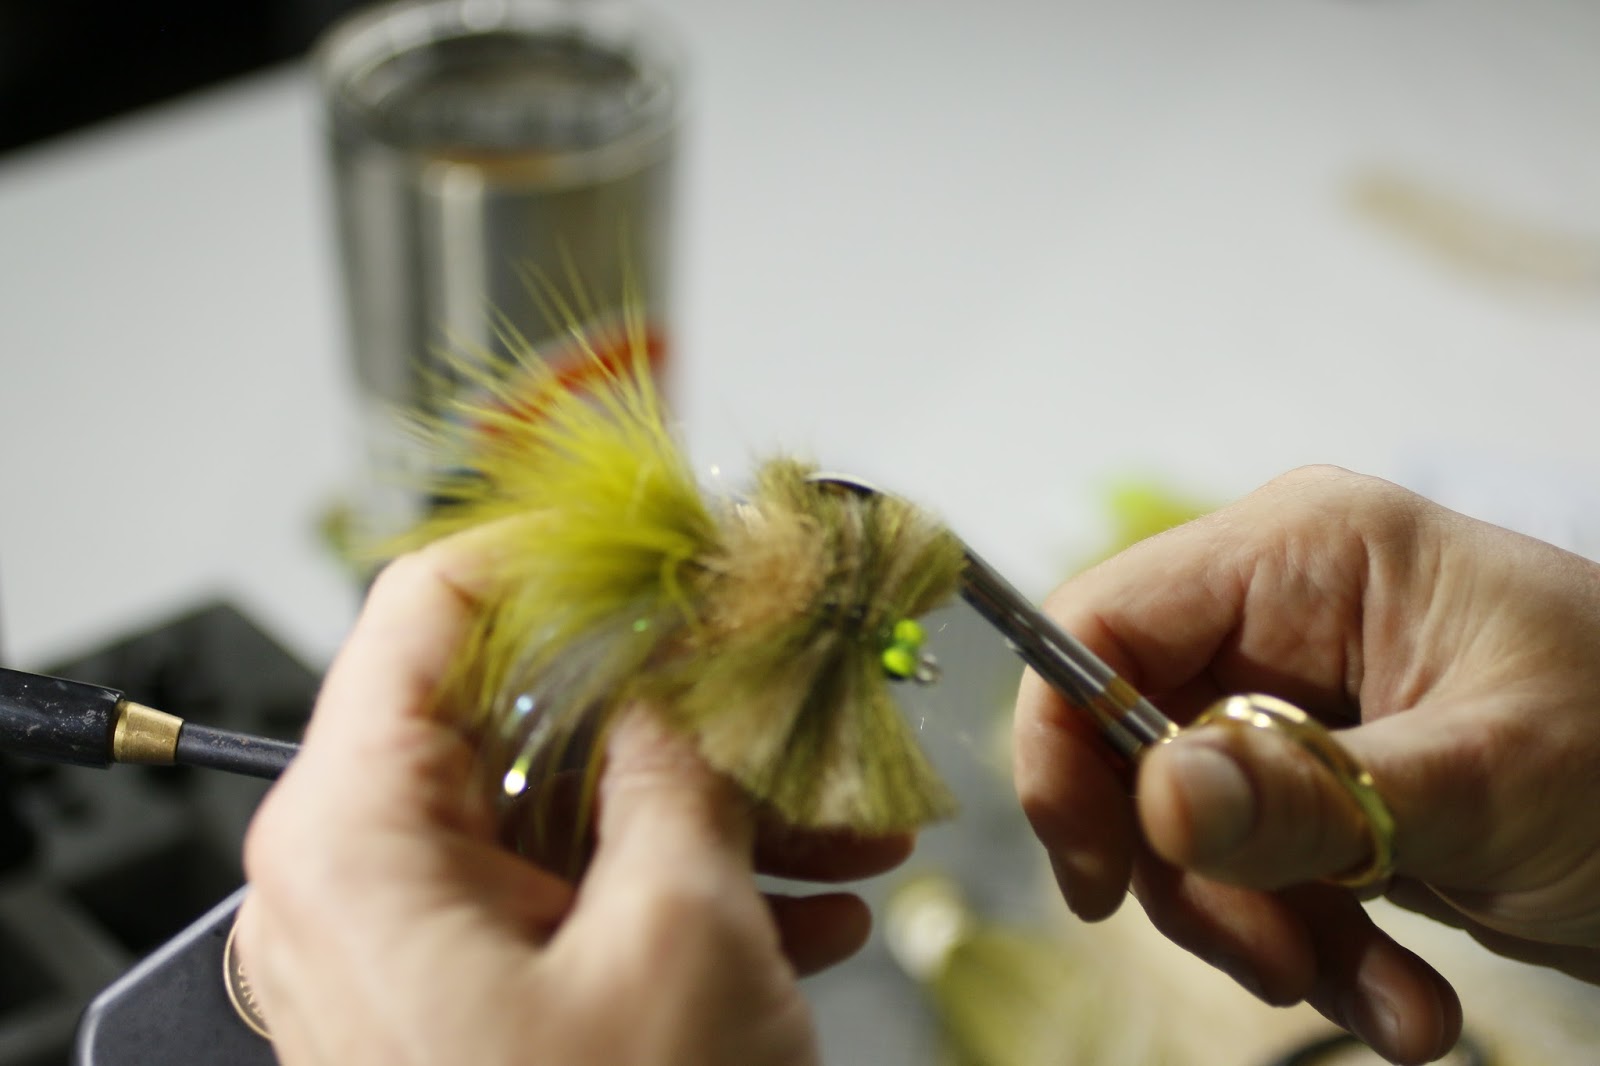
13. After allowing the Zap-a-Gap to set-up. I then remove the fly and use my Curved Scissors (All-Purpose Curved from Dr. Slick) and trim the EP Fibers to a rounded, crab shape. The fibers on each side I usually trim to right about 1", making the fly approximately 2" at the widest point.

After trimming I put the hook back into the vise.


14. Run a thread of Loon UV Thin along the hook shank, again covering up the thread wraps and center of the EP Fibers. I allow a bit to seep onto each side a bit as well....adding more security and making this a more durable fly. Cure the Epoxy with your UV Light. Then I turn the fly over and do the top side as well.
Now....take it for a swim!
Watch the Video!
Click Here to check out the details on our famous trips to the Woodland Plantation
Don't tie flies?....Click Here to buy these flies on our website
Click Here to subscribe to our YouTube Channel

Mad River Outfitters/The Midwest Fly Fishing Schools
Fly Shop, Classes, Schools, Guides, Hosted Travel and more!
813 Bethel Rd.
Columbus, Ohio 43214
614-451-0363