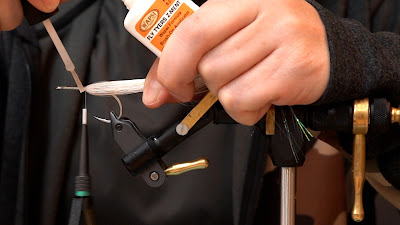
Step 1: Place hook in the vise and lay down a base of thread from front to back.
Step 2: Select a long bundle of bucktail, approximately 4-5 times the length of the hook shank. Tie in and secure so that your thread is hanging just behind the barb.
Step 3: Take a generous helping of flashabou, fold over thread and tie in directly above the tie in point for the tail. Ideally the longer section of flash should extend about 1/2-1 inch beyond the tail, providing more flash and movement to the tail. It is better to be generous with the flash as you can always cut it out if you feel it is not wanted by the fish.
Step 4: Select your next bundle of hair. Be careful not to select too much, less is more! You'll want this section of hair to be approximately 75% of the length of the tail section.
Step 5 wide: Once you have carefully measured your hair length, tie in so the tips of the bucktail are facing forwards. Make three loose capturing wraps around the butts. Take your thumb and fore finger and spread hair 360 degrees evenly around the hook shank and secure with tightening thread wraps.
Step 6: Using a push tool (empty pen casing works great) slide over the eye of the hook and up against the bucktail. Push the hair so that it is all facing rearward.
Z-Ment and begin to build your thread dam. This dam will be the biggest (tallest) as you want the bucktail to lay at a pretty flat angle. The time to build height, shoulders, and shape will be in the coming sections. I can not stress enough to reinforce every step with super glue as it will prevent your fly from prematurely falling victim to Peacock Bass or any of the other countless predators swimming around the Amazon.
Step 8: Just as in step 5, select another bundle of hair. This time you want your bundle to have a little more hair than the previous section. You'll want this hair to be approximately 80% of the previous section. You will follow this pattern/formula for the remainder of the way up the hook shank. The angle of each cone of bucktail should get progressively steeper as you move forward. This is what will bring shape and taper to your Hollow Fleye.
Step 9: Repeat step number 5 two more times. At this point you will have three hollow ties of white bucktail.
I like to tie in grizzly accent feathers down each side of the fly. This step is a great way to add contrast and depth to the the fly. Not only does this step make the fly look sexier but you will obviously catch way more fish compared to a fly with no accent feathers!
Step 10: At this point we are ready to tie in our last cone of bucktail. Just as before, tie in hair facing forward out over the eye of the hook. Secure butt ends with three loose wraps and spread hair evenly around the hook shank. Secure with strong tightening wraps and add another dollop of Z-Ment. Bring your thread through and in front of the bucktail and begin building your thread dam. Remember this dam will be the shortest of them all as you want to angle of this bucktail to be the steepest of all. Once finished, apply a generous amount of Z-Ment or UV resin to the thread head for durability.
The head can be any color you want. I have found having a bright contrasting color at the head not only triggers more Peacock's but will close the deal more often than if the fly is all one color.
If you have any questions in regards to tying this fly don't forget to watch this YouTube video as it will go into much greater detail than this article. Also, do not hesitate to call the shop if you want to speak to one of us directly.
Recipe:
Thread: Veevus 140 Power Thread
Tail: White Bucktail
Body: White Bucktail
Head: Red Bucktail
Lateral Line: Whiting Freshwater Streamer Saddles- Grizzly
Flash: Pearl Lateral Scale
Cement: Z-Ment


