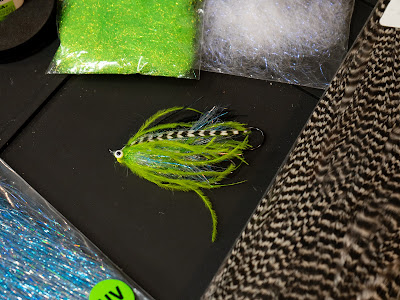
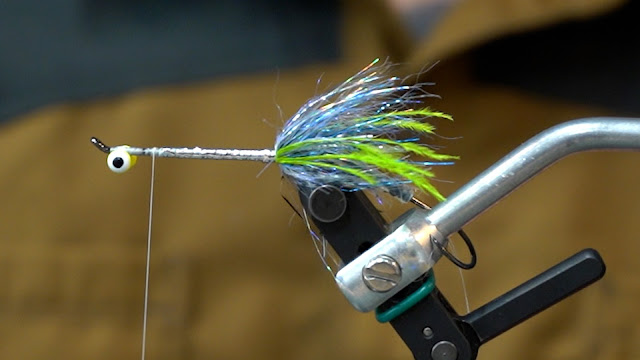
This specific pattern I tied utilizes a couple different techniques such as dubbing loops, composite loops and tinsel to enhance UV reflectivity. When inserting your material into your loops, make sure that your proportions on either side are consistent, but understand that if something comes out it is okay, it just means that it didn’t want to party. When it comes to wrapping your dubbing loop up past the tinsel I try to make those wraps more open to give space to the tinsel. The thought here is that the UV from your dubbing will bounce off the silver tinsel thus increasing the UV reflectivity which I think is a pretty cool design to this fly without having to add a ton of other materials. Lastly, keep a cup of water near your vise. Wetting your loops will help you get all the material back and keep your wraps tight to each other. The Intruder has built itself upon creativity so don’t be afraid to try different materials, sometimes that can build the best designs!
Far left is for the front shoulder station. Top right is for the back station. The bottom right is the hackle portion for the front station composite loop.
Step 1: Insert a 43mm shank into the vise and lay down a healthy amount of thread.
Step 4: Create a dubbing loop about 4-5” inches long but never longer than 5” at the back of the shank. Next run dubbing wax along the thread and grab your Ice Dub/Predator wrap mix for the back station and insert it into the loop slightly off center or other words 60/40.
Step 5: Next use the shepherds hook from your Loon Gator Grip and twist your back station. As Jerry French always says “just add water”. Wet your fingers in a cup of water to help pull the material in your loop back as you proceed to wrap your loop up the shank. After you tie off your loop use your bodkin to poke out any trapped down material and hit it quickly with a dubbing brush.
Step 6: On each side of your shank tie in 2-3 ostrich feathers that stretch slightly beyond your rear station.
Step 7: For this next step, I create a dubbing loop again about 4-5” in length and pin it back to get it out of the way. Next, I tie in large tinsel so when I wrap it up the shank the silver side will show. Move your thread forward leaving a little space behind the eyes.
Step 8: Wrap the tinsel up the shank making sure to lay it down in nice even even wraps slightly over one another. Tie off the tinsel where your thread is behind the eyes.
Step 9: Insert your Ice Dub into the dubbing loop you created at the back station, spin the loop and wrap forward with open wraps up the tinsel. You should have enough to create a small dubbing ball where your tinsel ends behind the eyes.
Step 10: Create a 5” loop for your final composite loop/front station. This will consist of Ice Dub, Predator Wrap and EP Sparkle. Run a healthy amount of dubbing wax on the thread. With one hand open the loop and insert the front shoulder/station so it sits off center or 60/40 in the loop. Once that’s in, place your front hackle into the loop below your shoulder. The front hackle is Ice Dub and Ostrich. Use your bodkin to fix anything that’s too uneven and make sure that your ostrich in your forward hackle sits way off center or 90/10 in the loop. Next twist up your loop!
Step 11: Wet the material while folding it back and palmer it forward with tight side-by-side wraps. You should be able to wrap just the bare thread at the end of the loop past the eyes and secure it down. Use your bodkin again to pick out any material trapped down and give it a good brush forward and back. Do not worry if any material falls out, it just wasn’t meant to be.
Step 12: Tie in 6 pieces of the black ostrich feathers in front of the dumbbell eyes. Make sure the length of the ostrich stretches back to your rear station. This is going to act as the wing of your fly.
Step 13: Next, on each side of the fly, tie in one of the feathers from your grizzly saddles. Make sure the length stretches back to your rear station. I like to have them splayed out from the sides a touch but you can also tie them in so they sit straight back on the sides of the fly.
Step 14: Whip finish and put down a layer of bone dry. Hit the resin with your light and your
intruder is ready to fish!
Recipe:
Thread: Veevus 6/0 (White)
Ice Dub (UV Pearl, Blue & Chartreuse)
EP Sparkle (Blue)
Ostrich Plumes (Chartreuse & Black)
Mylar Tinsel (Large)
Small Double Pupil Eyes (Chartreuse)


