Winter hatches in Ohio are very few if existent at all. Once we get to late winter, the end of February and into March, we see the first hatch that the fish actually key in on. Winter Stones, Little Black Stones, Snow Flies... they have many different local names. These small aquatic insects have always gave me hope that the depths of winter are soon to be over. Showing themselves as small black specks on the snowy bank or crawling up your waders, Winter Stones should find a place in your nymph box anytime you are targeting trout this time of the year.
Thinking back to a few situations that stand out in my mind, I am reminded of a snowy evening on my local trout stream. Many years ago I was able to spend a few hours fishing into the evening while large snow flakes fell slowly between the Hemlock and Rhododendron. I love the quietness of snow falling around pine trees and this place is one of my favorites. The fishing is what brought me there, but no matter how the fishing was the quietness is really what I was after. This time I was awakened from the mindless repetition of slowly swinging streamers by a lone rise. I did a second take and the rings on the water proved my questioning. Earlier in the evening the snow banks and my waders were crawling with Winter Stones. I had often seen this event, but never really focused on fishing these flies. As the snow continued to fall many more rises were happening. I waded out to the seam just down stream of the rising fish and held my net just under the waters surface. I quickly saw Winter Stoneflies struggling to get out of the water and crawling up my net. The next few days I stood waiting in the evenings for more of the Stoneflies to return to the water to drop eggs. Even though there were plenty of freshly tied dries in my box no more risers were witnessed.
The dry fly game with Winter Stones is not something to focus on with great success...at least not in this area. Fishing the nymphs though will provide much greater success. The nymphs do not swim or drift up to the surface, but crawl out on shore and then hatch. As they crawl, they fall or get washed into the water. Trout and Steelhead will key in on these bugs big time. We will often switch to a black stone when the typical egg bite stops suddenly for Steelhead. March and a little sun on a riffle is sometimes all it takes to make these bugs wake up from their winter slumber. Give a Winter Stone a shot when things slow down this time of the year and you will most likely be surprised with the results.
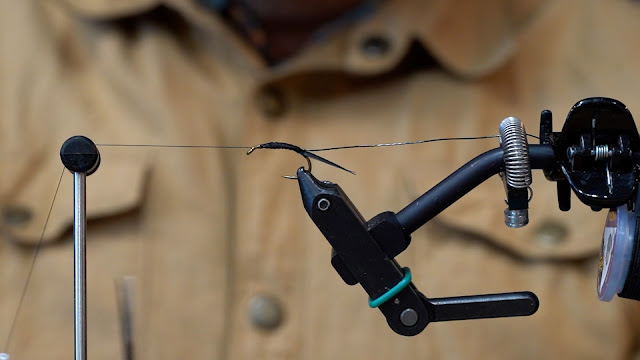
Step 1: Place a Tiemco 2457 in the appropriate size in the vise and wrap thread well back onto the bend of the hook. Build up the thread at this point as it will help with setting the tail.
Step 2: Select two Turkey Biots off of the short side of the stem. These are used here because of the hook size, but Goose Biots are a better choice for smaller hooks size 10 - 16. Tie them in one at a time so that they are slightly on each side of the hook, but still overlapping on top.
Step 3: Once they are set in place, carefully wrap your thread over the butts and up to the middle of the hook shank. Trim off the biot butts. I then like to use crisscrossing wraps here to make sure they do not rotate on the hook. Once they are tied down, place side by side wraps back up to the half way point on the hook. These layers of wraps will help create an under body.
Step 4: Tie in your Ultra Wire on the side of the hook nearest you. Start with the end of the wire at the mid section of the hook and wrap the wire down along the hook to where the tails are tied in. Cover the wire with firm crisscrossing wraps and then work your thread up to the half way point of the hook. Place a half hitch over the hook and place your thread on the bobbin holder (if you have a rotary vise.)
Step 5: Wrap the wire with side by side wraps up the hook shank to the half way point on the hook. Tie off and trim the wire.
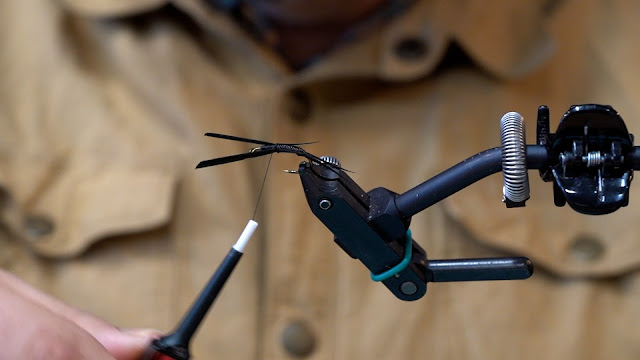
Step 6: Wrap your thread back over top of the last wrap or two of wire. Select two more Turkey Biots and tie them on either side of the shank.
Step 7: Trim off the butts of the biots and cover them with a layer of thread.
Step 8: Tie in a thin slip of Thin Skin with the shiny side down and extending back towards the tail.
Step 9: Apply a thin "noodle" of Ice Dub to your thread.
Step 10: Wrap the dubbing into a small ball. Make sure to keep this dubbing ball close to the Thin Skin, but not over top of the biot legs.
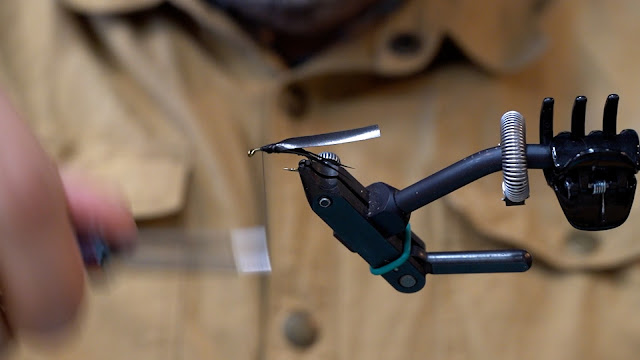
Step 11: Carefully fold the Thin Skin over the dubbing ball. Try not to pull too tightly on the Thin Skin as it will mess up the colorization on the skin.
Step 12: Next place two wraps to tie it down.
Step 13: Fold the Thin Skin back again and place two wraps over the fold to hold it back.
Step 14: Add two more biot legs on each side of the hook. Make sure that the biot legs extend back to roughly the middle of the first set.
Step 15: Trim off the butts of the biots and cover with a layer of thread.
Step 16: Apply another thin noodle Ice Dub onto the thread and create a dubbing ball slightly larger than the first.
Step 17: Again carefully fold over the Thin Skin and tie it down.
Step 18: Fold back the Thin Skin like before and place two wraps over the fold to hold it back.
Step 19: Select another set of Turkey Biot legs and tie them in on the sides of the hook as before. These too will extend back to the middle of the previous set of legs.
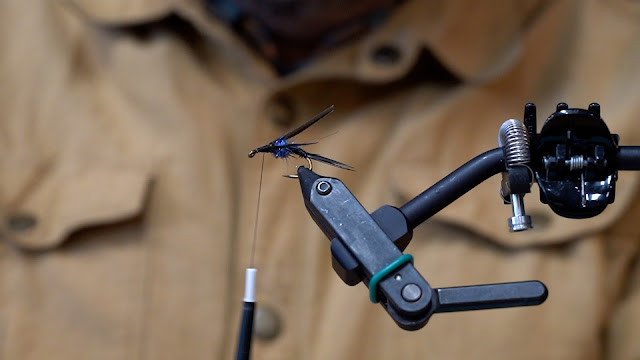
Step 20: Trim and tie off the biots. Repeat the dubbing ball of Ice Dub like before.
Step 21: Fold over the Thin Skin and tie firmly off making sure not to crowd the eye of the hook.
Step 22: Whip finish over top of the Thin Skin, but right behind the hook eye. While the Thin Skin is still forward apply a small amount of Z-Ment to the thread wraps right behind the eye of the hook.
Step 23: Trim the Thin Skin with a short tag remaining.
Step 24: Before the Z-Ment dries, fold back the short tag of Thin Skin and hold it for a few seconds with your finger. This will significantly strengthen the head of your fly making it more durable.
Your fly is now done. If you are tying this fly in smaller sizes then leave out a set of legs. You can add a thin layer of UV resin over top of the Thin Skin and that will make the fly more durable. It will also keep the shell casing shiny. This fly was tied on a size 8 with Steelhead and Salmon as the focus. If you are looking to match the actual size of the real insect focus on sizes 12-16.
Recipe
Hook: Tiemco 2457
Turkey Biots (Black)
Ultra Wire (Black)
Thin Skin (Black)
Ice Dub (Midnight Haze)
Z-Ment


